I'd seen Alton Brown on TV and watched him prepare a no-knead bread and cook it in his dutch oven. Perhaps that was worth trying as a temporary stop gap measure till my elbow healed?
No-knead breads were something we tried in the 70's. Back then we joked ... No knead. No work. Not because they weren't much effort, but because the results were ... unimpressive to say the least.
Perhaps back in the 70's we tried to rush the process, because this time, more or less following what I could only call a slap dash method, the results were outstanding! Not only are my loaves significantly cheaper than what's available at the supermarket or local bread stores, they're far tastier, and allow for a wider range of ingredients, and best of all there are no unknown additives!
Ingredients
- 4 cups flour ... I usually use 2 bread flour 2 wholemeal. But you can also substitute rye, spelt, soy for some of the wholemeal. I've also used Atta flour which was fine. Note - all wholemeal can be somewhat heavy and adding soy flour seems to help it rise.
- 2 teaspoons yeast
- Pinch salt
- 1 Tablespoon oil (I've successfully used butter, olive, coconut, macadamia and avocado oils)
- 1 teaspoon or so of sweetener to nourish the yeast. (I've used white, brown, dark cane sugars and assorted honeys - all were successful). I'll try molasses soon.
- Grains: Sunflower seeds, Pepitas (pumpkin seeds), linseed, raw buckwheat and I'm sure there are many more interesting grains available in different areas. The selection here isn't exciting. I might add 1/4 cup of each, depending on how I feel and what's left in the pack.
- Liquid: If I have leftover whey after making soft cheese, (here's the soft cheese recipe!) I use that, it gives a slightly different flavour depending if I've used lemon juice or vinegar for coagulation, otherwise I use water. Depending on the amount of wholemeal and whether I'm distracted it can vary between 2 and 4 cups. I heat it to be snugly warm to an arthritic knuckle.
Method
- Combine all dry ingredients and mix to distribute the seeds, yeast etc evenly.
- Make a depression in the middle. This stops the flour puffing up when you slosh in the liquid.
- Add the warmed liquid.
- Stir till it looks like a muffin mix and is just combined. It shouldn't take any effort at all. 1-2 mins max.
- Spray a small amount of oil on top and around the sides of the bowl.
- Now cover and let it rise (Not in the hot sun! We have temps up to 45C here and the dough dries out and lumps up in an awkward way) I put a large soup bowl on top and leave it on the table then tend to forget it till a few hours later when it begins to smell deliciously yeasty. I've also left it in the frig overnight and let it rise the next day which worked well.
Now the messy (fun) part
Scoop the dough onto a floured area. I use a baking tray generously sprinkled with flour just to keep everything together. It's quite sloppy and very sticky, so the challenge is to scoop and flop the dough onto itself a couple of times - not too much! I do it about 8 or so times, but when it's extra gooey a few more times with extra flour so I can get it into the pan without too much sticking to the tray. If you're using a dutch oven, juggle the dough into a large well oiled bowl to rise again while the dutch oven heats.
Turn the oven on to 220C (that's according to the flour pack, but I've also cooked the bread at 200C which worked fine).
If using a dutch oven, grease it and put it in the oven to heat (if you're camping and have an open fire, put it in the coals).
Then after 20 mins CAREFULLY (burns hurt!) put the dough in the dutch oven with a splash of olive oil and sea salt on top and cook with the lid on for 20 mins. Take the lid off and cook for about another 20 mins. (Half way through I turn it 180 because my oven cooks unevenly). Then check for doneness - it should look golden brown and sound hollow when you tap it with your knuckles.
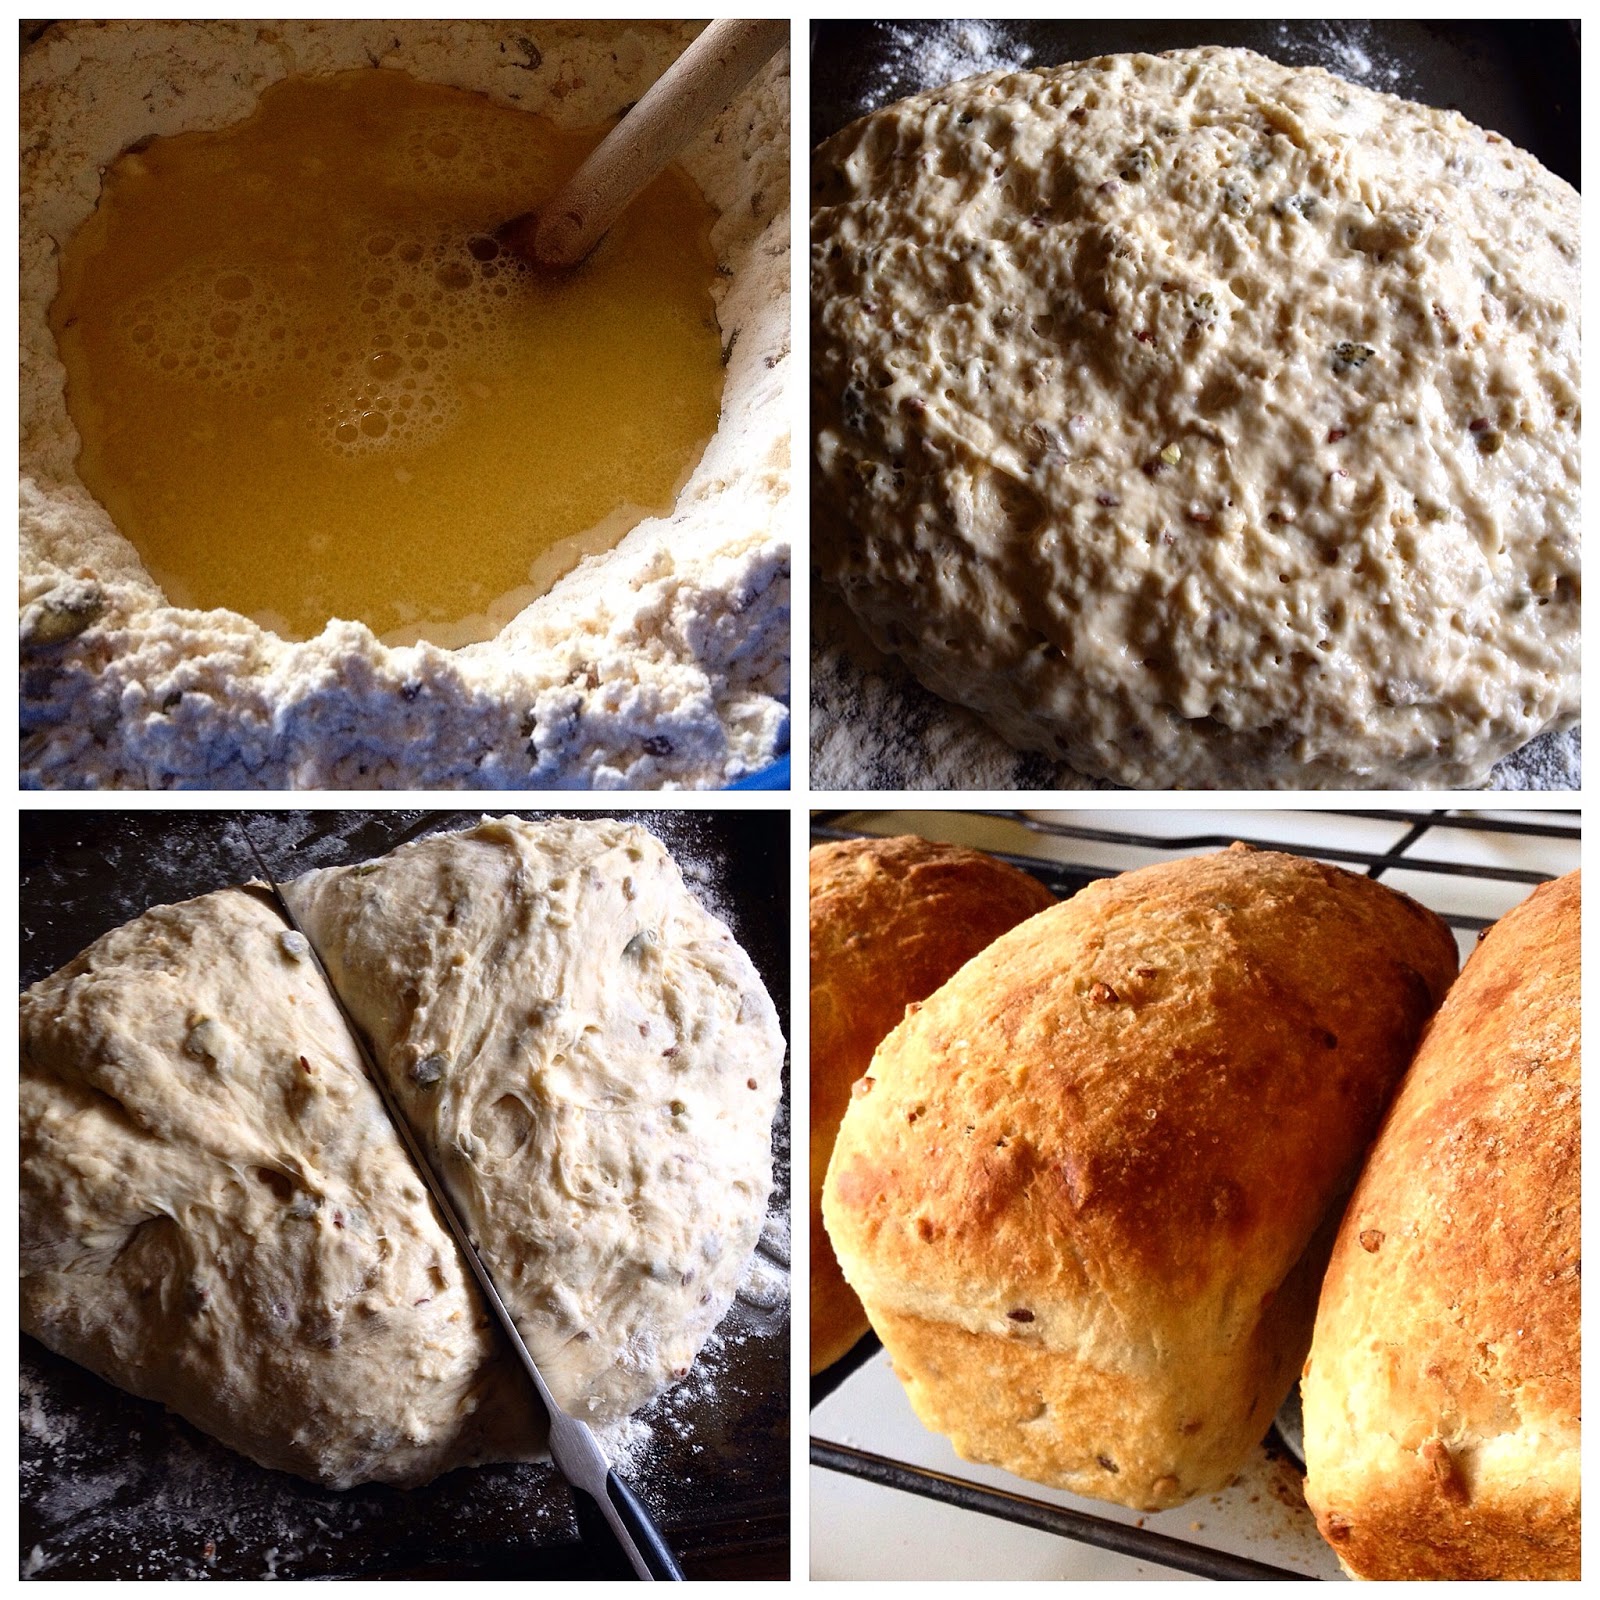
Yesterday we wanted square bread to make jaffles - I only had one standard loaf tin and two petite loaf tins. I cut the dough into halves and one half into halves again then kneaded (not in the traditional way, more a lethargic fold and flop) - till they were neat and the right shape to fit into the pans. I left them to rise about 15 mins then put them in the oven. The small loaves took about 15 mins, at 200C the larger loaf tin about 20 - 25.
Today I used 2 cups bread flour and 2 rye, added a mix of seeds, some cardamom, some finely grated orange rind and a sprinkle of caraway seeds.
Oh. My. Goodness. That's a winning recipe!!! The dash of orange rind is amazing!
As an aside I'd always accepted that it was vital to follow the recipe on the back of the flour pack precisely if you wanted perfect bread of the knead variety. It was an eye opener to follow a discussion on Instagram where a friend went to a bread making class and used far more liquid than I'd ever dreamed of - it seemed to be far too wet, but it worked. He posted pictures of the process, and there was a discussion about the % of liquid and what happened when that % was varied. I figured if he could get great results there was nothing to prevent me being a bit more relaxed about quantities and working on the trial and error basis. It's been fascinating to see the different textures that come from adding more liquid.
Would I go back to the traditional way of making bread by kneading, knocking back and kneading again? Possibly not - this way of making bread works wonderfully, it's quick (apart from the rising time) and there's little chance of aggravating my elbow.
Why do we outsource so much cooking when it's so easy to do our own? I feel we've brought into the con that food preparation is too hard - it's the domain of a professional, and in doing so, we've lost the skills and sense of achievement of making a meal from scratch .... and to be honest, I really appreciate the positive comments, the outlet for creativity and experimentation ... and the wonderful aromas!
.